How to be as awesome as Nate
Aldo music lovers. Welcome back to school and, if you are still reading, welcome to my music column. Let me give you a little back ground of myself. I am Nathan Manley and am a non-traditional sophomore. I am a declared music major, focusing on voice and guitar. I have played guitar for over 15 years and taught off and on for the last seven.
This archived article was written by: Nathan Manley
Aldo music lovers. Welcome back to school and, if you are still reading, welcome to my music column. Let me give you a little back ground of myself. I am Nathan Manley and am a non-traditional sophomore. I am a declared music major, focusing on voice and guitar. I have played guitar for over 15 years and taught off and on for the last seven.
Something I hear often when I tell people I’m a guitarist is, “I have a guitar and I’d play it more, but it needs new strings.” I’m willing to bet many of you have this problem and it baffles me because I love playing on a brand new set of strings and it takes little time and effort to change them. I thought I might help by teaching you the quickest and most effective way to change a set of guitar strings on an acoustic guitar.
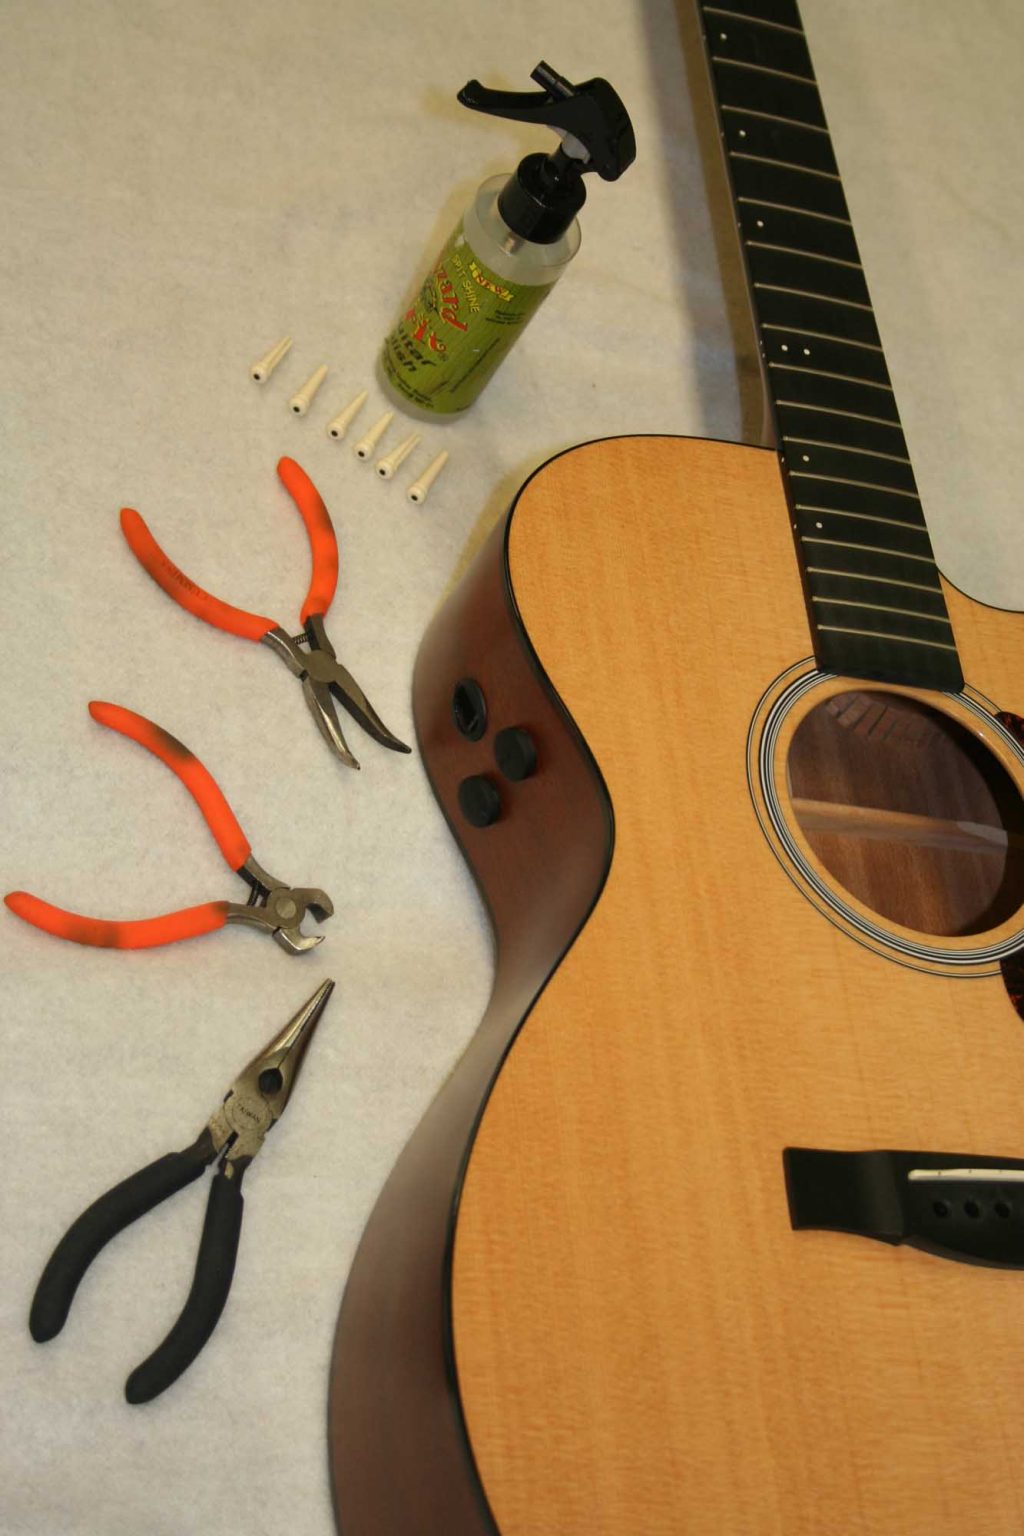
First, I recommend to have a clean area like a workbench, a kitchen counter or even coffee table. Just something that you can set the guitar on and even better, if you have something to rest the guitar’s neck. The advantage to having a work area is this will free up your hands and you have all your materials in front of you, see example 1.
Next, after you’re set up, release the tension from all six strings and take them off the machine-head posts and from underneath the bridge pins on the opposite side. Their are various multi-tools you can purchase(along with new strings) either in Price at Lee’s Music or any other music store that can help pull out the pins and also cut and wind the strings. Once all the old strings are removed, I clean my guitar of all the gunk that accumulates from the dirt and oils from my fingers or even skin particles that are shredded from your fingertips while strengthening your calluses.
At this point it might be easiest to put the set of new strings back in with the bridge pins, see example 2. Although if you would like to focus on one string at a time, it is entirely up to you. Either way, once they’re inserted into the bridge and they’re ready to start winding onto the head posts. Just a side note, I always start with the smallest gauge or number one/high E string and work my way up to the thickest gauge or number six/low E string. Personally, I use medium-gauge strings so the high E will be .013mm and low E will be .056mm. String sizes and brands is all personal preference and there are literally hundreds to choose from so it might be wise to experiment with various sizes and brands.
There are many ways to secure the string around the post with a hundred winds or knots, but recently I found a new way that is proving effective. The first thing you want to do is align all the post holes so they’re perpendicular with the neck. Next, pull the string all the way through the post hole while still leaving a little slack around the nut (or the end slot of the neck), see example 3. Just remember to go from the outside in, once the string is through the post hole. Just thread the string underneath itself, see example 4. Then all you do is the opposite, going from the inside out back over itself. Basically you’re just wrapping the string around itself instead of around the post, see example 5. This method locks the string in place so all you need to do is tune the string. While you’re winding the string, it’s best to keep tension on the string just above the nut to force the wind (or the number of times it wraps around the post) downwards, see example 6. Once again remember you can either do each individual string separately or thread them all at the same time as shown in the last example.
Basically that’s all folks, really simple stuff. Remember to work from the outside in, go underneath the string, pull it tight, go the opposite direction over top of the string and pull it tight again. Follow those directions and try to use the photographs to help. Remember new strings need to stretch so once you get it tuned, it will take a few days for the new set of strings to completely stretch out. If any of this is confusing, find me on campus and I will be more than happy to help you with any guitar issues.